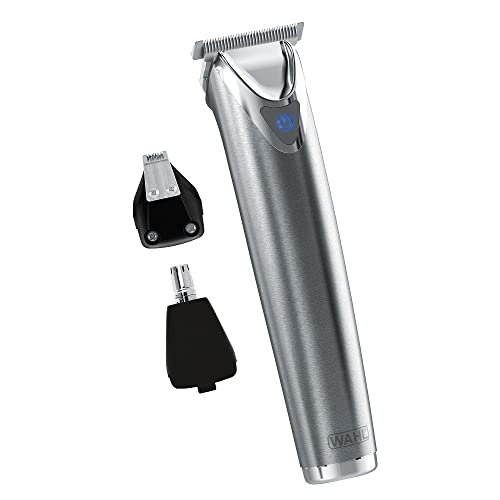
Check the cable with another device, clean charging contacts with rubbing alcohol, and if the battery is old (2+ years), consider replacement or a new trimmer.
Why It Happens: Three Common Culprits
When your beard trimmer stops charging, the problem usually falls into one of three categories: a faulty charging cable, a dead or degraded battery, or dirty charging contacts. Our editorial team compared specifications, buyer feedback and key decision factors to outline the most frequent issues. Let's break them down.
Faulty Charging Cable: Cables can fray, break internally, or have a loose connection at the plug or the trimmer port. This is the easiest thing to test first. Try using the same cable with another device (if compatible) or swap in a known working cable. Many trimmers use a standard micro-USB or USB-C cable, so you may already have a spare from another device. If the cable is proprietary, check for any visible damage like bent pins or a loose fit.
Battery Failure: Beard trimmers typically use NiMH or Li-ion rechargeable batteries. After 1-3 years of regular use, the battery loses capacity and may no longer hold a charge. In some cases, the battery can swell or develop an internal short, preventing charging entirely. NiMH batteries are common in older models and may have a memory effect if not fully discharged regularly. Li-ion batteries are more efficient but can degrade faster if exposed to heat or overcharging. If your trimmer is more than two years old and the battery no longer holds a charge, replacement is likely needed.
Dirty Charging Contacts: The metal pins on the trimmer and the charging base can accumulate hair, dust, and oils. This creates a layer of insulation that blocks the electrical connection. This is especially common in trimmers that sit on a charging stand. Over time, the contacts can also corrode if exposed to moisture. Regular cleaning with a dry cloth or alcohol swab can prevent this issue.
How to Fix: Step-by-Step Troubleshooting
Follow these steps in order. Most charging issues can be resolved without any special tools.
- Check the power source. Plug the charger into a different outlet. If using a USB cable, try a different USB port or wall adapter. Make sure the outlet is working (test with a lamp or phone charger). Sometimes the issue is simply a dead outlet or a faulty power strip.
- Inspect the charging cable. Look for visible damage like cuts, kinks, or bent prongs. If the cable is detachable, try a different cable that matches the voltage and connector type. Many trimmers use a standard micro-USB or USB-C cable. For proprietary cables, check the connection points for any debris or damage.
- Clean the charging contacts. Dampen a cotton swab with isopropyl alcohol (70% or higher) and gently rub the metal contacts on both the trimmer and the charging base. Also clean the charging port on the trimmer if it has one. Let everything dry for 5-10 minutes before trying to charge. For stubborn grime, use a soft toothbrush or a wooden toothpick to gently scrape away debris.
- Reset the trimmer. Some models have a reset button (check your manual). If not, remove the battery (if possible) or unplug it, wait 30 seconds, and reassemble. This can clear a temporary electronic glitch. For trimmers with a built-in battery, you may need to press and hold the power button for 10 seconds while unplugged.
- Test with a different battery. If your trimmer has a removable battery, try a fresh set of rechargeable batteries (if it uses AA/AAA) or a compatible replacement pack. For sealed units, skip to step 6. Make sure the new batteries are fully charged and the correct type (NiMH or Li-ion).
- Let it charge for an extended time. If the battery is deeply discharged, it may take up to 24 hours to show a sign of life. Leave it plugged in overnight and check again. Some trimmers have a protection circuit that prevents charging if the battery voltage is too low; a slow trickle charge may revive it.
- Check for battery swelling. Remove the battery (if accessible) and look for bulging, leaking, or a misshapen cell. A swollen battery is dangerous and must be replaced immediately. Do not attempt to charge it. Dispose of it according to local regulations for hazardous waste.
- Contact the manufacturer. If the trimmer is still under warranty (usually 1-2 years), reach out to the brand's support. They may send a replacement cable or unit. Provide the model number and purchase date. Many manufacturers have online chat or email support that can guide you through additional troubleshooting.
When to Contact Support or Replace the Device
If you have tried all the steps above and the trimmer still won't charge, it's time to consider professional help or a replacement. Contact the manufacturer if the device is under warranty. They may offer a free repair or replacement. Out of warranty? Compare the cost of a replacement battery or repair versus buying a new trimmer. Many mid-range trimmers cost between $25 and $60. A new battery (if available) might be $10-$20, but installation can be tricky and may require soldering. For most users, replacing the entire trimmer is the simpler and more reliable option, especially if the device is more than two years old. Look for a model with a detachable cable and easily replaceable battery to avoid this problem in the future. Also consider the overall condition of the trimmer: if the blades are dull or the motor is weak, a new device may be a better investment.
Preventing Future Charging Issues
To extend the life of your beard trimmer's charging system, follow these tips: Keep the charging contacts clean by wiping them with a dry cloth after each use. Avoid exposing the trimmer to moisture or extreme temperatures. Use only the original charger or a high-quality replacement with the correct voltage. Don't leave the trimmer plugged in continuously once it's fully charged (unless the manufacturer says it's safe). If you travel, store the cable in a separate pouch to prevent bending. Finally, consider buying a trimmer with a USB-C charging port for easier cable replacement. Additionally, avoid using the trimmer while it is charging, as this can generate heat that stresses the battery. Store the trimmer in a dry place at room temperature. If you don't use the trimmer for extended periods, charge the battery to about 50% and store it in a cool place to prevent deep discharge.
Understanding Battery Types and Lifespan
Beard trimmers commonly use two types of rechargeable batteries: Nickel-Metal Hydride (NiMH) and Lithium-ion (Li-ion). NiMH batteries are older technology and are often found in budget trimmers. They have a lower energy density and can suffer from memory effect if not fully discharged before recharging. Typically, NiMH batteries last about 1-2 years with regular use. Li-ion batteries are more common in modern trimmers. They have a higher energy density, no memory effect, and a longer lifespan of 2-4 years. However, Li-ion batteries are more sensitive to heat and overcharging. If your trimmer uses a proprietary battery pack, replacement may be available from the manufacturer or third-party sellers. Always match the voltage and chemistry exactly. Using the wrong battery can damage the trimmer or pose a safety risk.