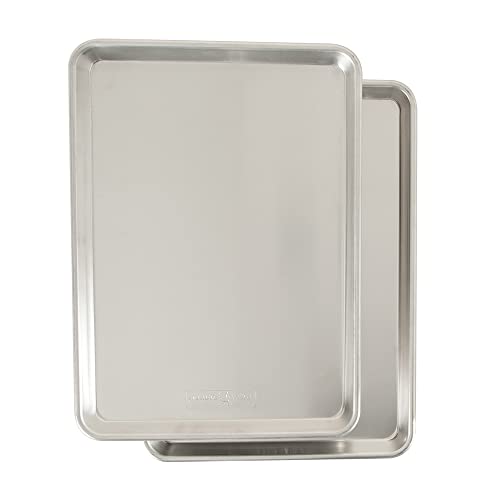
Bare aluminum and steel baking sheets are beloved for their durability and even heat distribution, but they lack the nonstick convenience of coated pans. Seasoning your baking sheet creates a natural, food-safe nonstick layer that improves with use. Our editorial team compared specifications, buyer feedback and key decision factors to bring you this comprehensive guide. Follow these steps to transform your bare metal sheet into a reliable nonstick surface.
Why Season a Baking Sheet
Seasoning is the process of polymerizing a thin layer of oil onto metal. When heated, the oil bonds to the surface, forming a smooth, hydrophobic coating. This layer prevents food from sticking, protects against rust, and develops a dark patina over time. Unlike chemical nonstick coatings, seasoning is natural, non-toxic, and can be renewed indefinitely. It also improves heat conductivity and gives baked goods a crispier bottom crust. For example, cookies spread less and develop a uniform golden color on a well-seasoned sheet. Roasted vegetables caramelize without tearing, and even delicate fish fillets release easily. The seasoning also fills microscopic pores in the metal, creating a barrier that resists corrosion. Over time, the patina becomes darker and more nonstick, similar to a cast iron skillet. This process is especially beneficial for aluminum sheets, which are prone to reacting with acidic foods like tomatoes or citrus; the seasoning layer prevents metallic flavors from leaching into your food.
Choosing the Right Oil
The oil you choose determines the quality and durability of the seasoning. Look for oils with a high smoke point (above 400°F) and a neutral flavor. The best options are:
- Grapeseed oil: High smoke point (420°F), neutral, and creates a hard, slick finish. It is widely available and affordable, making it a top choice for beginners.
- Avocado oil: Smoke point up to 520°F, very stable, and produces a durable coating. It is slightly more expensive but withstands high roasting temperatures without breaking down.
- Flaxseed oil: Smoke point around 225°F, but polymerizes well if used in thin layers and baked at lower temperatures (300°F). It yields a very hard finish but can flake if applied too thick. Many enthusiasts use it for the initial coats.
- Vegetable or canola oil: Affordable and common, with moderate smoke points (400-450°F). They work but may require more coats to achieve the same slickness as grapeseed or avocado.
Avoid butter, coconut oil, or olive oil as they have low smoke points and can leave sticky residues. For example, olive oil smokes at around 375°F, creating a gummy layer that attracts dust and feels tacky. Stick to the recommended oils for best results.
Step-by-Step Seasoning Process
Before you begin, wash your baking sheet with hot soapy water to remove any factory residues or rust. Dry thoroughly. Then follow these steps:
- Apply a thin layer of oil. Pour a small amount of your chosen oil onto a lint-free cloth or paper towel. Wipe the entire surface (including sides and bottom) with a very thin, even coat. The sheet should look almost dry with just a faint sheen. Excess oil will pool and create sticky spots. If you see droplets, wipe them away.
- Preheat the oven. Set your oven to 400-450°F (depending on oil smoke point). Place the sheet upside down on the middle rack to prevent oil pooling. Put a foil-lined baking sheet on the lower rack to catch any drips.
- Bake for one hour. Let the sheet heat for 60 minutes. The oil will polymerize, darken, and bond to the metal. Your kitchen may smell slightly smoky; ensure good ventilation by opening a window or using the exhaust fan.
- Cool completely in the oven. Turn off the heat and leave the sheet inside until cool. This prevents thermal shock and allows the coating to fully harden. Do not remove it while hot, as the coating may be soft.
- Repeat 2-4 times. For a robust nonstick layer, repeat the oiling and baking process two to four times. Each coat builds on the previous one, creating a darker, slicker surface. You can test the nonstick quality by baking a batch of cookies; if they release easily, the seasoning is sufficient.
After the final coat, your baking sheet is ready for use. It will improve with each use as more oil polymerizes naturally during cooking. For example, roasting vegetables at high heat will deposit additional oil layers, enhancing the nonstick properties.
Maintaining the Seasoning and Avoiding Rust
Proper care extends the life of your seasoning and prevents rust, especially on steel sheets. Follow these tips:
- Clean gently. After each use, rinse with hot water and scrub with a soft sponge or brush. Avoid soap or abrasive cleaners, as they strip the seasoning. For stuck-on food, use a paste of coarse salt and water or a plastic scraper. For example, burnt cheese can be removed by boiling a little water in the sheet and scraping with a wooden spatula.
- Dry immediately. Towel dry the sheet completely, then place it on a warm stovetop or in a low oven for a few minutes to evaporate any moisture. Rust forms quickly on bare steel if left wet. A quick heat dry ensures no water remains.
- Apply a light oil coat after cleaning. Rub a tiny amount of oil onto the surface with a paper towel to refresh the seasoning and protect against moisture. This step is crucial for steel sheets in humid climates.
- Store in a dry place. Avoid stacking other pans directly on the seasoned surface. If stacking, place a paper towel or cloth between sheets to prevent scratching. Storing in a cabinet with silica gel packets can help control humidity.
- Reseason as needed. If you notice food sticking or see rust spots, scrub the affected area with fine steel wool, wash, dry, and apply a new coat of seasoning. For minor rust, a single coat may suffice. For large rust patches, repeat the full seasoning process.
With regular care, a seasoned baking sheet can last for decades and outperform many nonstick alternatives. Check the current price on Amazon for high-quality bare aluminum or steel sheets to start your seasoning journey.
Troubleshooting Common Seasoning Issues
Even with careful technique, you may encounter problems. Here are solutions to common issues:
- Sticky or tacky surface: This usually means the oil layer was too thick or the baking temperature was too low. Wipe off the sticky residue with a paper towel and repeat the seasoning process with a thinner oil coat and proper temperature.
- Uneven color or patchy seasoning: Caused by uneven oil application or temperature fluctuations. Ensure the sheet is level in the oven and oil is spread uniformly. You can fix patchiness by applying another thin coat and baking.
- Flaking or peeling: Often due to using too much oil or not allowing the sheet to cool completely between coats. Scrape off loose flakes with a plastic scraper, then reseason from scratch with thinner layers.
- Rust spots: If rust appears, scrub the area with fine steel wool until the metal is clean, wash, dry, and apply a fresh seasoning coat. For persistent rust, consider using a rust converter or replacing the sheet if the metal is pitted.
- White residue on aluminum: Aluminum can develop a white oxide layer when exposed to moisture. This is harmless but can be removed by scrubbing with a vinegar and water solution (1:1) and then reseasoning.
By addressing these issues promptly, you can maintain a high-performing nonstick surface for years. Remember that seasoning is a living layer that improves with use and care.